A cultured human being should pursue a good hobby. It’s somewhat more interesting if said hobby involves a mild vice or foible. The hobby should also develop skill and produce a satisfactory end product. It should make the person somewhat unique amongst a group of peers and allow them to develop camaraderie with their fellow hobbyists. It becomes a Schelling Point so to speak.
In my case it usually tastes pretty good as well. Because of that, I commend to your consideration the activity of homebrewing. Homebrewers do have great get togethers. Especially if three or four have new brews to collect and trade with their friends. It’s inexpensive to start and you can choose a level of time investment and difficulty that match your budgets of both time and shekels. I describe below how you can brew better than Miller or Buttweiser with a reasonable investment.
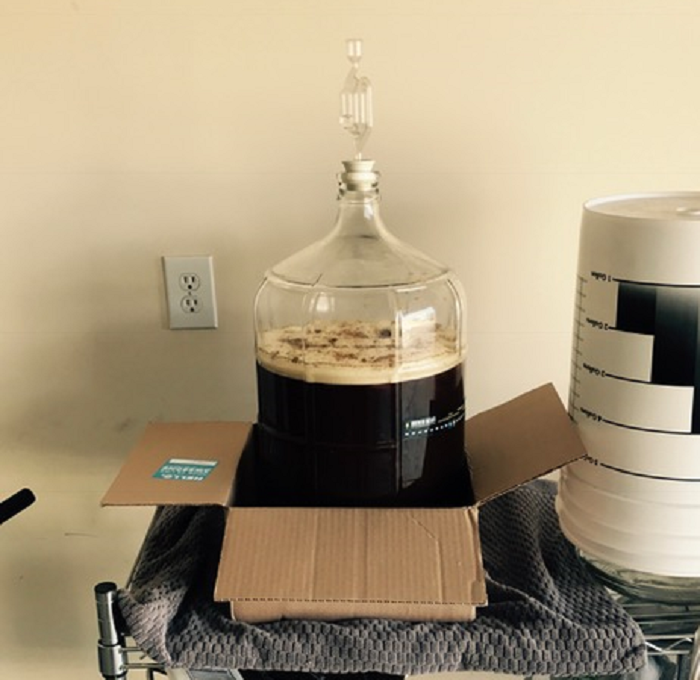
- Buy good, durable equipment. The most important element is the fermentation container. I suggest a good glass carboy with a small neck that can easily be vaccuum-sealed with a one-hole stopper and an airlock. Northern Brewer is the brand I went to. Other companies make quality glassware. You will also need a bottling bucket and maybe a back-up carboy if you want to brew anything that involves more than 1 fermentation. The easiest way to get started properly is to go ahead and buy a starter kit.
This will typically contain: 2 carboys, 1 bottling bucket, 2 one-hole stoppers, 2 airlocks, 1 wort kettle (5 gallon capacity), the wort spoon, 1 bottle brush, 1 carboy brush, 1 siphon hose, 1 grain net, 1 plastic funnel, 1 siphon pump, 1 large hose 1 carbuoy stand, 1 spigot for the bottling bucket, 1 bottle-capper.
Additional things you will need: 1 Container of Star-San (or other industrial strength sanitizer), several rags, 1 bucket (Homer Buckets from Home Depot are great for this purpose), a storage rack for your gear (Shelving is good, a per board to hang small items on is also a nice touch if you have garage or basement space), 50 glass bottles (12 oz. or 25 oz. are the home-brewer sizes of choice. You can get by with about 25 bottles if you use the 25 oz.), Caps for your bottles.
- Once you have the carboy, you will need to decide what you want to brew. I suggest going with a darker recipe the first few times you try and brew. This allows you two or three minor screw-ups without ruining a batch. Your typical commercially available kit will provide you with a grain mix, Barley Malt, Hops, Brewer’s Yeast and Priming Sugar.
The brewing process involves three key dates.
- Wort preparation and yeast pitching. This involves preparing the wort (the funny-smelling mixture of grain tea, Barley Malt and Hops that will hopefully get turned into some serious brewage) and then pitching the yeast. The wort preparation involves several fun steps.
- Sterilize the wort kettle, the wort spoon, the funnel, 1 carboy, 1 one-hole stopper and 1 airlock.
- Put 2-3 gallons of water in the wart kettle, put the grains from your kit into the grain sock. Insert the grain sock into the kettle and leave it there until the water reaches 170 F. You’ll have a pan full of water that looks like tea at this point.
- Meanwhile, if you are using commercial Barley Malt, warm the jug in a sauce pan of water so that it can be way more inviscid.
- Add Barley Malt and hops if your recipe hops early. Bring pan to a controlled boil.
- Boil for 1 hour at controlled level. Add hops or other flavoring as your recipe requires during the boil.
- Stop up a sink and put as much ice as you can in it. Put the wort kettle in the sink and leave it their until your wort reaches 70 F.
- Add 2 gallons of water to the carboy. Add chopped up fruit if you are brewing a lambic. Add cedar or jalapenos if your recipe calls for either. These are both added to the carbuoy during Primary Fermentation.
- Transfer the wort from the kettle into the carboy.
- Carefully pour the Brewer’s Yeast into the carboy. Stopper the carboy. Add the airlock. Pour about 1TSP of water into the airlock so that it will function.
- Shake the carboy until a lot of foam rises from thew wort. At this point, the yeast is pitched and your beer will start to ferment.
- A lot of recipes call for a Secondary Fermentation. After about 2 weeks, you will transfer the wort from your first carboy to your second one using a funnel and a filter to get rid of sedimentation and articles such as fruit chunks, cedar chips or other items used to flavor the beer that won’t go in the bottle. Sterilize everything involved well and place the carboy with the wort on a table top or chair above the carbuoy you will use for Secondary Fermentation. This makes siphoning go well and easily transfers the wort. Once the siphon is done, stopper the carboy, insert the airlock. Put 1 TSP of water in airlock.
- Bottling Day (Oh Yeah!)…
- Get two buckets of water (I use a Home Depot Homer Bucket and the bottling bucket with the spigot inserted). Fill one with Star San water and one with tap water.
- Take all your bottles and run them 1st through the Star-San bucket to sterilize and then through the water bucket to rinse. Leave them on a clean horizontal surface to dry.
- Sterilize all your siphoning and bottling equipment. Sterilize bottle caps and bottle capper.
- Using a saucepan, heat about 1.5 cups of water and your priming sugar. Stir so that the priming sugar dissolves leaving a clear liquid in the sauce pan.
- Sterilize the bottling bucket. Run sterilizer water through the spigot to sterilize the spigot.
- Pour the priming sugar water into the bottling bucket. Place the carboy holding the wort at an elevated position. Place the bottling bucket at a lower one.
- Siphon the wort into the bottling bucket. You should have approx. 5 gallons of beer in your bottling bucket (fermented wort + priming sugar = beer). You may be a Gal or so short and can make up the difference with tap water or produce less than 2 cases of brewski (Your call, Dude).
- Lift the bottling bucket to an elevated position like a stool or a chair. Put a towel on the floor under it. Take each bottle and fill to within about 1 inch of the top.
- Insert cap into bottle capper, Carefully cap each bottle.
- When all bottles are capped, store in a cool dark place for 2 to 3 weeks so that the priming sugar makes carbonation.
- refrigerate 12 -24 hours and then congratulations! You may now enjoy the awesome.
Like many things post-modernity, homebrewing your own beer requires that you get out of the “shopper’s mentality.” This will take work, but it is enjoyable work, and so you need to stop thinking in terms of literal time and income. You must instead think of a product, and put yourself into the mentality that having power over the end result and enjoying a skill will create more than a beer, but a tradition in which you are bonded to your world and distanced from the crazy neurosis of almost all people around you, especially in cities.
Tags: alcohol, beer, homebrewing, the good life


“refrigerate 12 -24 hours and then congratulations! You may now enjoy the awesome.”
fuck off, reddit
I’ve been considering getting in to cider and soda brewing.
Cider is interesting idea. I’ve been chopping up fresh fruit in my last view brew as a way to boost the Alcohol Content a couple percent. I tried it at first for flavor but noticed the enhancing effect. Yeast likes adding fruit sugars to a balanced diet…
Only the freshest jenkem, straight from the source.
Brewing is a traditional (dating back to really early times) way of turning possibly contaminated water into something which is safe to drink and which can be stored. That’s possibly a bit incomprehensible to people who think ‘clean drinking water’ grows on its own in pipes which just exist and who can’t imagine drinking anything which contains alcohol except with the intent to get blind drunk as quickly as possible (who thus usually prefer taste-free industrially produced alcohol – sold as Wodka – mixed with fruit juice).
Kind of tough to do beer brewing in my apartment, but I’ve been thinking of brewing up some kvass. That’s pretty easy to make, and I’ve been curious what it tastes like.
Do you have a closet that isn’t full or a parking garage on the premises? Either of those places work to let the wort ferment.
I’ve been tempted lately to start making wine again, being in a apartment is the only issue. The press tends to create swarms of fruit flies.
Only other slighttt problem would be finding grapes that haven’t been soaking up fucking toxic waste. All the local places that had good grapes years ago are filled with trash now or the plants have been destroyed.
A porch with a railing is a good ladder to grow grapes.